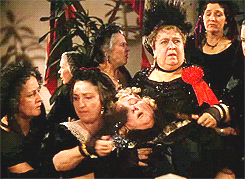
Many stories have a character similar to Aunt Pittypat Hamilton.
Someone who grounds the story in the past. Not unlike the Dowager Countess in
Downton Abbey, she values etiquette very highly. Unlike today, asking “what
will people think?” seems is a very relevant point, but unlike the Dowager, she
doesn’t have those snappy quick one liners. She does serve her purpose though,
she’s setting the scenes of the expectations of society of the time.
In this day and age, I think we’re just used to stronger women.
Scarlett is obviously pointedly portrayed as the strongest female character and
even in her own quiet way, as is Melanie to a degree, but Aunt Pittypat is just
SO delicate (eye roll). And I think thereon lies my ambivalence, I think. On
the one hand, as the childless aunt, I get it, a lady needs some help every
once in a while but as a modern woman, I was raised to be strong and highly
capable. How I long for the days when these roles were much more clearly
defined and expectations of society were more clear. But the thing is, she over
does it— always pulling out those smelling salts so she doesn’t faint, which
actually we now know was often due to either a too-tight corset or being too
warm from so many layers of clothing in the heat of the deep south. This is
especially so of Aunt Pittypat who is often seen with a shawl and all
trussed-up like a thanksgiving turkey, often covered all the way up to her
neck— a few things we need to keep in mind when we’re making stitch
choices.

Sometimes designers paint canvases in such a way that it’s
difficult to use the particular specialty stitch you want. This was the case
with the diamonds across the bust of Ms. Pittypat’s dress. The diamonds are
painted at an angle and they’re different sizes. I’m assume this was done to
show perspective, so I quickly decided that to stitch right over the painted
pattern to create my own grid was probably the easiest way to go. I stitched a
Double Hungarian in four strands of Planet Earth Port V 1172 which is an
overdyed thread. And notice I’m stitching right over her collar too, we’ll
bring that back later, I promise. I then used two strands of DMC 550 to outline
the diamonds in a zig-zag pattern and three strands to stitch Nobuko for the
solid dark area that look like straps and her empire waist. I flipped the
stitch direction of the Nobuko to suit the angles appropriately and stitched
basketweave for the verticals empire waistline. I don’t use basketweave/tent,
but I always incorporate a bit into every canvas as it gives the eye a place to
rest, you can’t have everything be the highlight. Then I stitched Serendipity
stitch using the overdyed Planet Earth thread for the area under the waistline,
which I think of as her tummy and top of her skirt.


I originally was going to applique purple ribbon for the dark
purple/strap-like areas and waistline but it just didn’t look right... it
looked too much like suspenders. Just goes to show you, what you think is a
given might not always work. And honestly Nobuko is one of my favorite
stitches. My students often say think I believe that no canvas is complete
without a bit of Nobuko, and they’re probably right because it’s a very
versatile stitch. I think I said it before and at the risk of repeating myself,
the classics are just that for a reason— because they WORK!

And speaking of classics, we’re using T stitch (aka alternating
basketweave) for the sleeve. This is one of those areas you often encounter
where the painting is vague, where does the shoulder end and the sleeve
begin? I have found the best way to treat those kinds of area is use a stitch
that doesn’t call attention and let the area just kind of blend in.
You know what I do want to feature though? Those dots down
either side of her bodice. I don’t know what they are and you can only get an
idea that something’s there in our inspiration photo, so I decided sequins
would be a good look and I attached them using clear thin quilting thread. It’s
a bit of a bear to work with but you can hardly tell they’re attached so it’s
worth the aggravation.
Back to Aunt Pittypat’s trussed-up-ness... we need to do
something fabulous with that collar, so I got my hands on a bit of scalloped
1/4 inch doll lace. When you are on your travels and you see bits of lace or
trim, or doll buttons, just pick them up for your stash. If your LNS (local
needlework shop) doesn’t have what you need, Etsy is also a good way to go.
Using the same thin clear quilting thread, I attached the lace using tiny
stitches putting subtle little folds as I go which is what will make this lace
stand up a bit off the piece and really give dimension. You can obviously
attach lace flat but that’s not the look we wanted this time. I did bury the ends of the lace using the loop method that I talked about in my Last Post and I whip-stitched the lace to the back using the same clear thread but you could use one of the purples threads as well. I am pretty pleased with how it came out, if i do say so myself. It is always fascinating to me how it doesn't take much of a little something extra to bring a piece to life.

In our next episode we’ll stitch Aunt Pittypat’s skin, her
smelling salts bottle, finish off that sleeve (you didn't think I would leave it that way, did you?) and perhaps talk about her hair.
Fidelis is a master with hair techniques but since I know we want dimension,
we‘ll probably have to save that to the bitter end...I hate it when I have to
be patient! But more to come in our next installment, so stay tuned. And
if you haven’t subscribed, please consider doing so and don’t forget to click
the link in the email you're receive to verify your subscription (if you don't receive it, please check your junk/spam). And follow Miss
Pittypat’s example and spread the word about this blog to your stitching
friends.