Showing posts with label B. F. Goodstitch. Show all posts

Monday, May 13, 2019

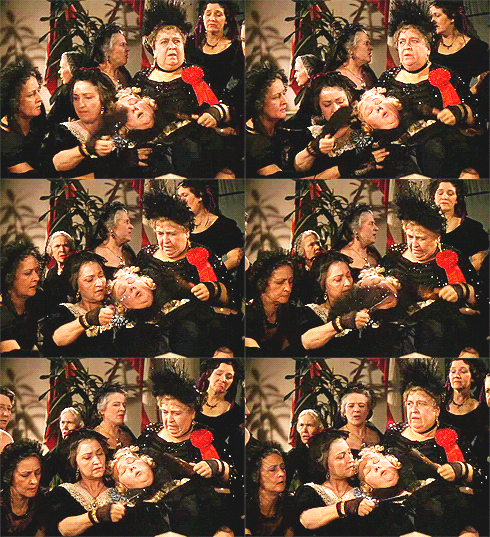
Oh dear where are my smelling salts? I think I shall faint!


Many stories have a character similar to Aunt Pittypat Hamilton. Someone who grounds the story in the past. Not unlike the Dowager Countess in Downton Abbey, she values etiquette very highly. Unlike today, asking “what will people think?” seems is a very relevant point, but unlike the Dowager, she doesn’t have those snappy quick one liners. She does serve her purpose though, she’s setting the scenes of the expectations of society of the time.

In this day and age, I think we’re just used to stronger women. Scarlett is obviously pointedly portrayed as the strongest female character and even in her own quiet way, as is Melanie to a degree, but Aunt Pittypat is just SO delicate (eye roll). And I think thereon lies my ambivalence, I think. On the one hand, as the childless aunt, I get it, a lady needs some help every once in a while but as a modern woman, I was raised to be strong and highly capable. How I long for the days when these roles were much more clearly defined and expectations of society were more clear. But the thing is, she over does it— always pulling out those smelling salts so she doesn’t faint, which actually we now know was often due to either a too-tight corset or being too warm from so many layers of clothing in the heat of the deep south. This is especially so of Aunt Pittypat who is often seen with a shawl and all trussed-up like a thanksgiving turkey, often covered all the way up to her neck— a few things we need to keep in mind when we’re making stitch choices. 

Sometimes designers paint canvases in such a way that it’s difficult to use the particular specialty stitch you want. This was the case with the diamonds across the bust of Ms. Pittypat’s dress. The diamonds are painted at an angle and they’re different sizes. I’m assume this was done to show perspective, so I quickly decided that to stitch right over the painted pattern to create my own grid was probably the easiest way to go. I stitched a Double Hungarian in four strands of Planet Earth Port V 1172 which is an overdyed thread. And notice I’m stitching right over her collar too, we’ll bring that back later, I promise. I then used two strands of DMC 550 to outline the diamonds in a zig-zag pattern and three strands to stitch Nobuko for the solid dark area that look like straps and her empire waist. I flipped the stitch direction of the Nobuko to suit the angles appropriately and stitched basketweave for the verticals empire waistline. I don’t use basketweave/tent, but I always incorporate a bit into every canvas as it gives the eye a place to rest, you can’t have everything be the highlight. Then I stitched Serendipity stitch using the overdyed Planet Earth thread for the area under the waistline, which I think of as her tummy and top of her skirt.


I originally was going to applique purple ribbon for the dark purple/strap-like areas and waistline but it just didn’t look right... it looked too much like suspenders. Just goes to show you, what you think is a given might not always work. And honestly Nobuko is one of my favorite stitches. My students often say think I believe that no canvas is complete without a bit of Nobuko, and they’re probably right because it’s a very versatile stitch. I think I said it before and at the risk of repeating myself, the classics are just that for a reason— because they WORK! 


And speaking of classics, we’re using T stitch (aka alternating basketweave) for the sleeve. This is one of those areas you often encounter where the painting is vague,  where does the shoulder end and the sleeve begin? I have found the best way to treat those kinds of area is use a stitch that doesn’t call attention and let the area just kind of blend in. 

You know what I do want to feature though?  Those dots down either side of her bodice. I don’t know what they are and you can only get an idea that something’s there in our inspiration photo, so I decided sequins would be a good look and I attached them using clear thin quilting thread. It’s a bit of a bear to work with but you can hardly tell they’re attached so it’s worth the aggravation. 

Back to Aunt Pittypat’s trussed-up-ness... we need to do something fabulous with that collar, so I got my hands on a bit of scalloped 1/4 inch doll lace. When you are on your travels and you see bits of lace or trim, or doll buttons, just pick them up for your stash. If your LNS (local needlework shop) doesn’t have what you need, Etsy is also a good way to go. Using the same thin clear quilting thread, I attached the lace using tiny stitches putting subtle little folds as I go which is what will make this lace stand up a bit off the piece and really give dimension. You can obviously attach lace flat but that’s not the look we wanted this time. I did bury the ends of the lace using the loop method that I talked about in my Last Post and I whip-stitched the lace to the back using the same clear thread but you could use one of the purples threads as well. I am pretty pleased with how it came out, if i do say so myself. It is always fascinating to me how it doesn't take much of a little something extra to bring a piece to life.


In our next episode we’ll stitch Aunt Pittypat’s skin, her smelling salts bottle, finish off that sleeve (you didn't think I would leave it that way, did you?) and perhaps talk about her hair. Fidelis is a master with hair techniques but since I know we want dimension, we‘ll probably have to save that to the bitter end...I hate it when I have to be patient! But more to come in our next installment, so stay tuned. And if you haven’t subscribed, please consider doing so and don’t forget to click the link in the email you're receive to verify your subscription (if you don't receive it, please check your junk/spam). And follow Miss Pittypat’s example and spread the word about this blog to your stitching friends.
Wednesday, February 14, 2018

“Heaven help the man who ever really loves you”....


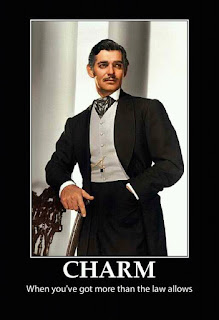
Bet that wasn’t the quote you thought I was going to lead in with, but it pretty much sums up the whole story. When I think of all the unforgettable characters in Gone with the Wind, Rhett Butler has got to be my very favorite. I mean a lot of us are attracted to the bad-boys but he’s not just that, I think he’s multi-faceted in comparison to many of his fellow characters. Let’s face it, everyone else is pretty consistent. Scarlett is selfish, vain and completely self absorbed, Ashley always his wishy-washy idealist self, Melanie the sweet, angelic one and Mammy’s just trying to keep her attitude at an appropriate level. But Rhett, on the other hand, one moment he’s bringing trinkets to Scarlett (and in the book to Miss Pittypat and Melanie too) another a hardened blockade runner but in the midst of a sinking south, he’s the only character with the gumption to tell it like it is — whether you're going to like what you hear or not. In some ways I find him more gentlemanly than the illustrious Ashley, at least he respects women enough to be honest with them. Let’s look at all the great one-liners Rhett has, shall we?
 
I mean those are some unforgettable lines! My personal favorite is the one about being kissed and often and by someone who knows how...wooh whoooo, Miss Pittypat pass me your smelling salts for I dare say my knees get weak at the thought of it!!! If you’ve read the book, and if you haven’t, I highly recommend you do, there are entire characters in the book that are missing from the movie, Rhett’s wardrobe is portrayed more like a dandy, wearing bright snappy colors and always the latest fashions for Paris, so I’m going to keep that in mind and amp up that purple ascot. His stature in the book is also much bigger (more Cary Grant than Clark Gable actually), but I digress.... I decided to start with his suit jacket since is the largest expanse of his outfit. I wanted something that looks almost knitted so I went with Vineyard Merino in Pale Honey (M-1189) and Glazed Ginger (M-1191). This thread has a tight twist so as you stitch you want to let the needle fall and relax that twist a bit. Because this thread has so much texture, I wanted to keep the stitch relatively subtle, the look of a light tweed and Kennan stitch fit the bill perfectly. The empty space within the stitch leaves a little breathing room to show off the character of this thread and keeps the thread from appearing too heavy. It’s slightly loftier than I would normally use on an 18 count canvas but with that bit of breathing room it works. 
 
When you use lighter coverage stitches you need your thread to be a really good match, otherwise you need a stitch with full coverage. This is kind of the situation I ran into with Scarlett’s bow shown below. I know I’m going to put silk ribbon over this area, so I stitched right over the bow and assume that the silk ribbon on top is going to cover enough of the green you don’t see it peaking through the stitch and even if it does you won’t notice because of the bow’s shadow. 


This is why you can’t stitch areas in a vacuum, because as much as you think each area is their own, they aren’t, the piece is layered and you have to approach it that way. I don’t want to have to deal w this area again later if my silk ribbon bow doesn’t completely cover, might as well fill it in completely now and prevent potential headache later.

With Rhett being dark and handsome, the thread pallet we’ve been using for the other characters’ skin shading won’t do. Rhett is slightly darker, more tan, so I’m going to use the Splendor color card in Bronze (as opposed to porcelain, like the others) to help with shading. I know I’ve talked about the Rain Gallery thread cards before but seriously, having so many skin shades in a single card is so convenient. Choose the correct card for the tone you’re using and it’s like half the work is already done for you. For Rhett’s skin I’m using three strands of colors S1085 for the outlines of his face, S1131 for the shadows, S1085 for the checks, S1083 for the highlights, and S1098 as the majority of his skin tone. I’m using all the colors on the card except the darkest one at the bottom. 


If I do say so myself, the colors for Rhett’s skin are spot on, I especially like the blush color which isn’t too pink. You may notice a little something going on with his nose, as I was stitching, I took one long stitch diagonally down the length of his nose from the upper left to the lower right and then basketweaved over it. It’s a quick and easy way to add just a subtle padding to the peak of the nose. I don’t incorporate this on all of the people I stitch but I felt his nose didn’t have enough definition color-wise, again it’s subtle so I’m not sure if you can even notice it in the picture but sometimes the smallest changes are enough to add a bit of character. Here is that subtle padding before it was all covered up (sorry for the bad quality photo).

And here is our Rhett thus far.:

Next time we’re going to deal with Rhett’s hair. NEVER a strand out of place, even while saving dames in the middle of a burning Savannah. And I’ll finish off his other facial features, mustache,  boutonniere and ascot....oh, what to do??? Don’t you worry your pretty little head, I have some interesting ideas in mind, but like Rhett at the political discussion at the BBQ, I know when it’s time to take my leave.....for now....

If you haven’t subscribed yet, please do so to get updates directly in your email inbox, and please help us spread the word about this blog by telling your stitching friends!


Until next time.....

Wednesday, November 30, 2016

Well I do declare, it's been a terribly long time since my last post. I wish I could say I was at a southern plantation doing research but no such luck, I've been working like a field hand getting my yard under control before winter sets in. 

But who cares about me, let's get back to our southern bell, Miss Scarlett, in particular let’s talk about her hair. Now I will admit, stitching hair can be confusing. It's often painted in a single large block of color which can be a little daunting because it doesn't give you any real direction on how the stitches should go and this was the case with Miss Scarlett's. My personal favorite hair moment in Gone with the Wind is when Scarlett pulls her sister's curl. If I had a sister, I bet I would understand....let's hope trying to stitch all these hairstyles in this piece doesn't have me wanting to pull my own hair out! Luckily though, I've tackled a good amount of hair in my day so I've come up with a few tricks over the years, or at least things that work for me.


I've found when dealing with hair, my first thought usually leans towards texture. Do I want it slick, shiny and smooth like the ladies in those Pantene commercials? Or do I want it a little courser or thicker? The answer to these questions drive my decision on what thread to use. If I want Pantene lady, I'll go with something stranded like Splendor as you can't beat the sheen of stranded silk. If it's a difficult color to match or I want it a little more flat (like for a mermaid), I'll look at cotton floss or Floche (although not my favorite). But if I want coarser, bouncy hair, which in this case I do, I'll go with something with bit of a twist, like Vineyard or Pepperpot. For Scarlett I'll be using Vineyard Dark Earth #C-042. I find the color name slightly ironic since the scene before she wears this green dress is when her father explains that for anyone who is Irish "the land is like their mother" and that "land is the only thing that lasts". . . earth/land, they’re the same thing in my book. 

If you watch the movie it's hard to see exactly what's going on with Scarlett's hair in the barbecue dress scenes, I actually found a few drawings online that I found more helpful than trying to tell from photographs or the movie. It seems around the temples the hair is pulled back, which means that the different sections of the hair will be angled in different directions. When faced with a situation like this, I often find it's easier to mark it out before stitching. I know some people use the thread they're going to use to put in directional stitches, but more often I use either a Dritz Fineline Air Erasable pen (which only works on blondes or light colors since the ink color is purple), or if the hair is dark, like in this case, I find a white chalk pencil – like dressmakers use -- especially handy, and unlike the air erasable, I can mark it one night and come back the next day and decide if my approach is still on track or if I need to make adjustments. With air erasables they often fade away in 12-24 hours (depending on humidity) so be forewarned. The encourage every stitcher to seek out these two products. They last practically forever, aren't a big investment and you will use keep finding uses for them.


So in marking off my direction lines, I put lines near the bows in first, then the long waves and then the lines on the top third of her head that is being pulled back. As I mentioned, I found a drawing online very helpful but if this wasn't a movie character with a specific frame of reference, you could look at google images for inspiration to help you figure out how to break it up or use the white or blue chalk pencils with a damp clean cloth or new makeup sponge as the perfect eraser so you can experiment, or you could use the air erasable and then use the chalk over it once you figure out what you want.  Here is the result of my chalk lines.


A word of friendly advice when you have hair broken up in different directions. I stitch each area with its own thread. Even if I have enough left with my working thread, I will often stop that thread and start again in the fresh area. I know this might sound like unnecessary work but I do this so if I have an issue in my next area, I can cut/pull it out and not have to worry about the previous area which I'm already happy with. And here is progress after a short evening of work. 


We all like to think the next area will go as smoothly but if you encounter a challenge in the next and have to take it out, you will be glad you put in the 30 seconds of extra effort. And speaking of which, you may have noticed that my chalk lines in the second picture above is different than what I stitched in the progress picture directly above. I initially misread the sections directly below the bows. Thankfully, I (mostly) follow my own advice and I’m glad I did because the stitches in the sections directly below the bow were "self-contained" so when I figured out my “misread”, I could take them out and shift gears without much angst in the top of the head area which I was happy with.

I did the crown of the head with an angled satin. The areas directly below the bows are done in long and short and the draping hair areas on the sides were done in a combination of long and short, stem and split stitch. I like split stitch when trying to create waves because it seems to make for a smoother transition to change directions to create the wave. I often put in a few dividing lines and then start filling in, it keeps my lines from going too far astray. Here is an example of my initial dividing lines to break it up.


And finally, here is my finished product. Including eyebrows which I kept pretty simple, as don't need her looking like Brook Shields circa 1982 . . . 


So up next, we're going to tackle that amazing BBQ dress... and be warned, like the movie, we might need an intermission and do the dress in two blog posts.

In the meantime, please consider subscribing to my blog for delivery of new posts right to your inbox and if so, please remember validate your subscription by clicking the link in the email you will receive. You won’t want to miss a single episode of our Gone with the Wind extravaganza!